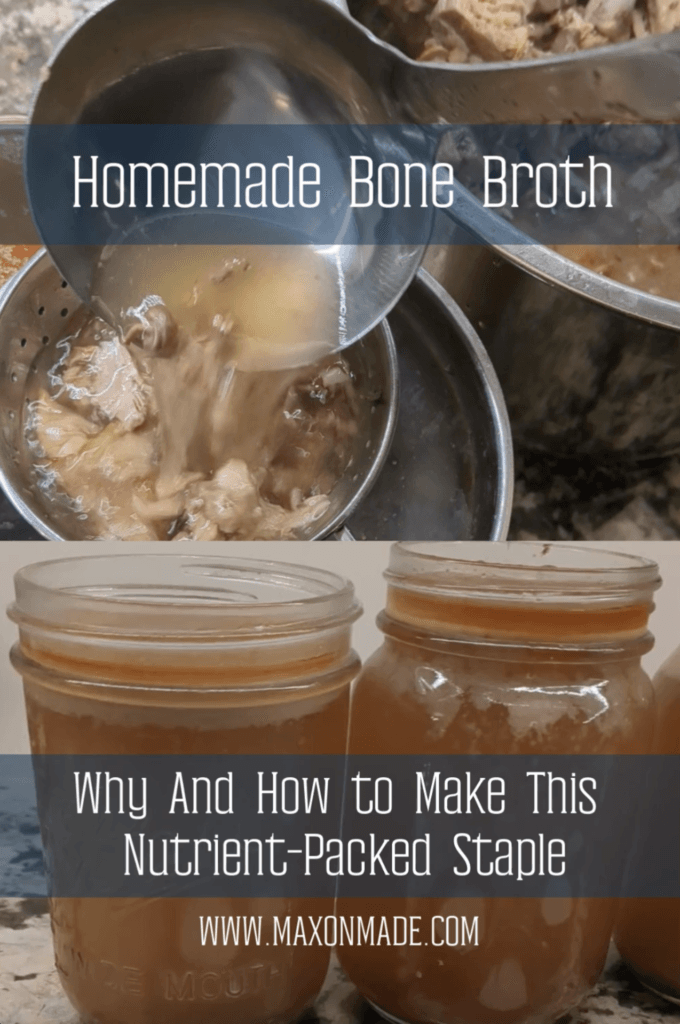
Homemade Bone Broth: Why And How to Make This Staple
When you’re using the whole animal, homemade bone broth becomes an easy ingredient to keep on hand. The nutrients and flavor go a long way in making your dishes stand out from the rest.
This post may contain affiliate links. Please read our disclosure policy.
What Is Homemade Bone Broth?
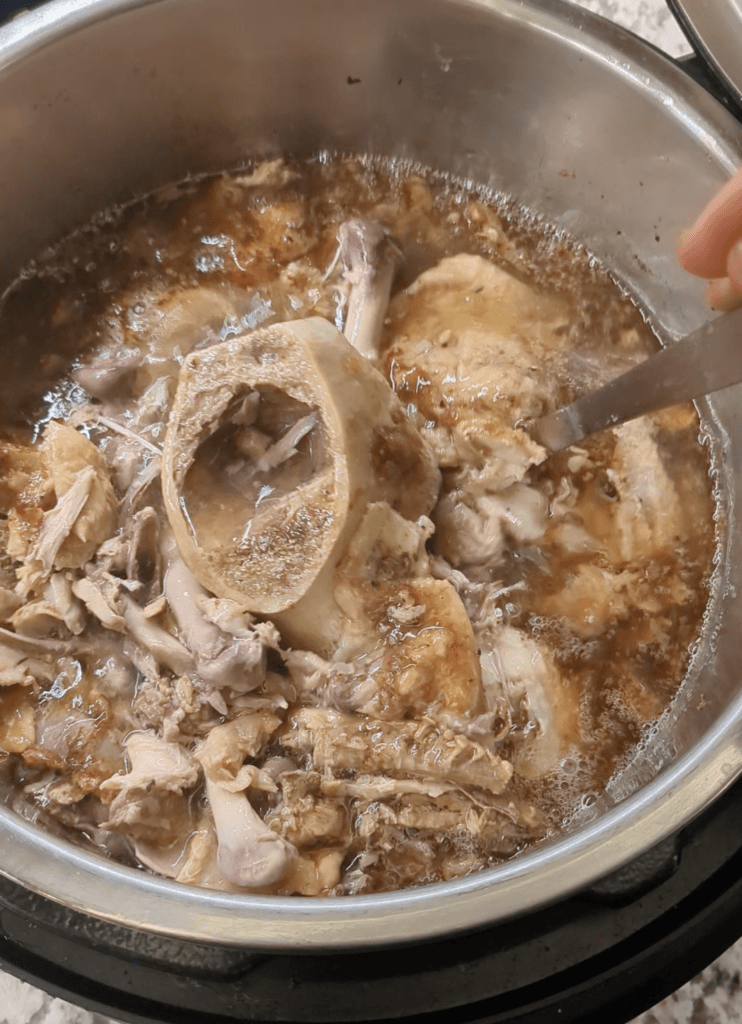
Bone broth is a nutrient-rich liquid made by simmering animal bones—sometimes with vegetables, herbs, and spices—for an extended period. This cooking process extracts collagen, gelatin, amino acids, and minerals like calcium, magnesium, and phosphorus from the bones and connective tissues, resulting in a deeply flavorful and health-boosting broth.
What sets bone broth apart from regular stock or broth is the time invested. While stocks and broths are typically simmered for a few hours, bone broth is cooked for 12–24 hours (or even longer) or pressure cooked. This extended cooking time is what makes bone broth so nutrient-dense.
It’s also incredibly versatile. You can sip it on its own as a comforting and healing drink, use it as a base for soups and stews, or add it to recipes that call for liquid to increase both flavor and nutrition.
Once I started making my own bone broth, I can’t go back to using plain water or bullion in soups and stews. I HAVE to have this on hand at all times.
Why Make Bone Broth At Home?
If you’re wondering whether making bone broth at home is worth the effort, the answer is a resounding yes. Here’s why:
1. Incredible Health Benefits
Bone broth is packed with nutrients that provide a wide range of health benefits:
- Supports Joint Health: The collagen and gelatin found in bone broth are vital for maintaining joint cartilage and reducing inflammation.
- Strengthens the Immune System: The minerals in bone broth, including zinc and magnesium, help support your body’s natural defenses.
- Promotes Gut Health: The gelatin in bone broth can help heal the lining of the digestive tract, making it a staple for anyone with digestive issues or leaky gut syndrome.
- Improves Skin, Hair, and Nails: Collagen is known for promoting elasticity and hydration in the skin and strengthening hair and nails.
Check out more benefits here, including helping to reduce inflammation and build muscle!
2. Sustainable and Cost-Effective
Making bone broth at home helps reduce food waste. Instead of discarding bones from a roast chicken or leftover vegetable scraps, you can repurpose them into a delicious and nutritious broth. Best of all, you’ll save money by avoiding expensive store-bought versions.
3. Culinary Versatility
Bone broth is a kitchen workhorse. Use it to enhance the flavor of soups, stews, gravies, or sauces, or simply enjoy it as a nourishing drink. Its savory profile pairs well with a variety of dishes, adding depth and complexity.
How To Make Bone Broth At Home
Making bone broth at home is surprisingly simple, requiring just a handful of ingredients and a bit of patience.
Ingredients You’ll Need
- Bones: Chicken, beef, pork, fish, or a mix. Joints, knuckles, and feet are especially rich in collagen.
- 2 tablespoons of vinegar: Apple cider vinegar is used to help extract minerals from the bones.
- Vegetables: Carrots, celery, onions, and garlic are classic additions, but feel free to use any scraps you have on hand, if desired. Vegetables are totally optional.
- Herbs and spices: Bay leaves, thyme, rosemary, and whole peppercorns are excellent options but also optional.
- Water: Enough to completely cover the bones.
Step-by-Step Instructions
- Prepare Your Bones
If you’re using raw bones, you can roast them first at 400°F for 20–30 minutes. This step enhances the flavor of your broth by caramelizing the bones. Also, use any bones you have saved from other meals. - Combine Ingredients
Add the bones, vegetables, herbs, and vinegar to a large pot or slow cooker. Pour enough water to completely cover the bones. - Simmer Low and Slow
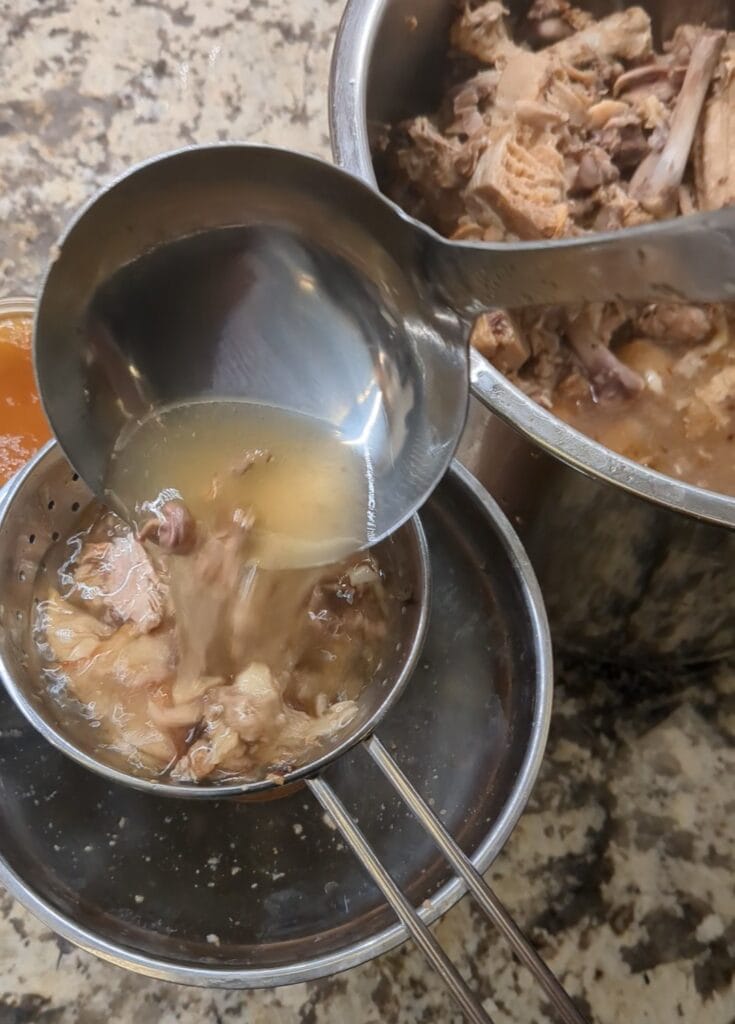
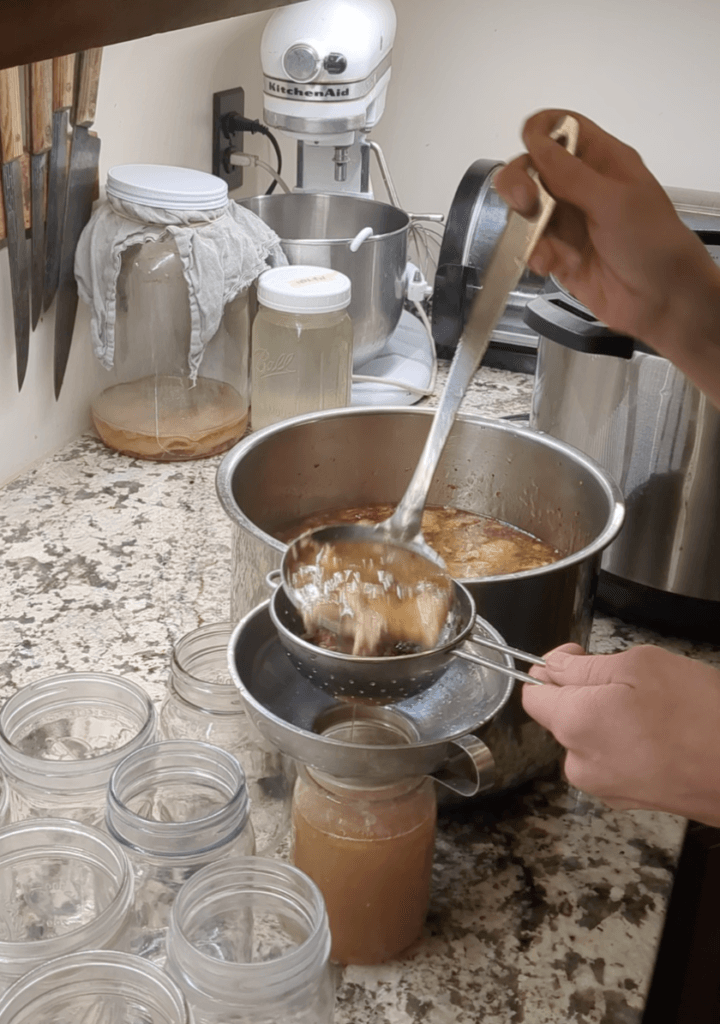
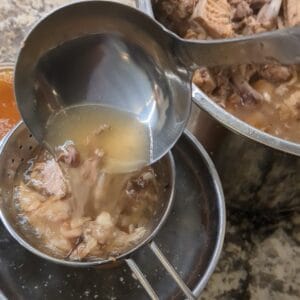
Bring the mixture to a gentle boil, then reduce the heat to a low simmer. Cook for 12–24 hours, adding water if necessary to keep the bones submerged. - Strain the Broth
Once the cooking is complete, strain the broth through a fine-mesh sieve into canning jars to remove solids. - Cool and Store
Let the broth cool to room temperature before transferring it to the fridge or freezer.
This method allows you to keep your bones cooking for days, gradually adding broth to meals along the way and giving you wiggle room for when you actually have time to jar it up.
Quick Homemade Bone Broth With An Instant Pot Pressure Cooker
If you’re short on time or prefer to avoid the prolonged aroma of simmering broth, a pressure cooker is your best friend. This method allows you to extract just as much flavor and nutrition in a fraction of the time.
How to Make Bone Broth in an Instant Pot Pressure Cooker
- Prepare the Bones: Just as with the traditional method, roasting your bones beforehand enhances their flavor. I also use any bones left over from other meals.
- Combine Ingredients: Add bones, vegetables, vinegar, and water to your pressure cooker. Be sure not to overfill—leave about 2 inches of space from the top to prevent over-pressurizing.
- Set the Pressure Cooker: Cook on high pressure for 2–3 hours. This is enough time to break down the bones and extract collagen and minerals.
- Release Pressure: Allow the pressure to release naturally for 15–20 minutes, then do a quick release to finish.
- Strain and Store: Follow the same straining and storage process as with the traditional method.
Benefits of the Pressure Cooker Method
- Speed: You can have a nutrient-rich broth ready in just a few hours instead of waiting an entire day.
- Convenience: The sealed environment of a pressure cooker minimizes cooking odors, which is ideal if you’re sensitive to the smell of long-simmering broth.
- Energy Efficiency: Using a pressure cooker requires less energy compared to simmering on the stove for hours.
This method is perfect for busy weeks when you want homemade bone broth without the time commitment or lingering aromas, but you have to be more prepared to finish the task that day.
How To Store Homemade Bone Broth
Proper storage ensures your broth stays fresh and ready to use.
1. In the Refrigerator
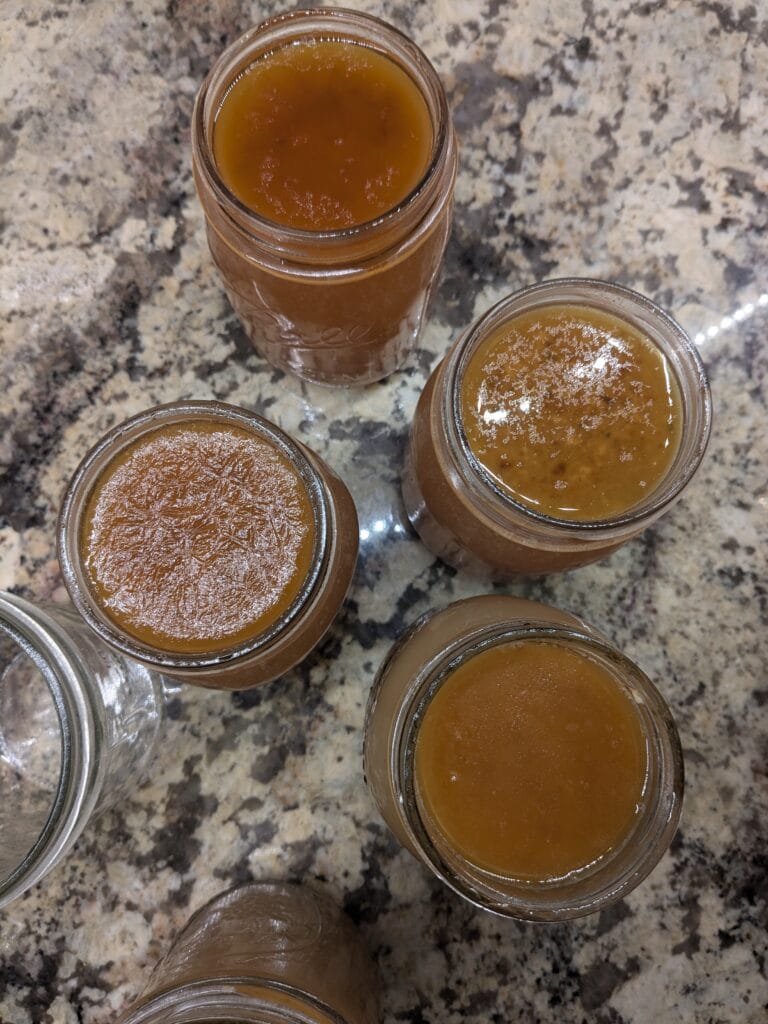
- Pour into wide mouth pint canning jars.
- Allow at least a 1/4 inch layer of fat to form on top of the broth. This natural seal protects the broth from air and extends its shelf life.
- Simply remove or use the fat layer when you’re ready to use the broth.
2. In the Freezer
- Pour the broth into freezer-safe containers, leaving some space at the top for expansion.
- My absolute favorite way to freeze soup or broth is with Souper Cubes! They’re great for freezing individual portions.
- I also love to freeze broth in ice cube trays. That way I can add a couple to any bowl of soup to help it cool down, without watering it down.
- Frozen bone broth will last up to 6 months.
Creative Ways To Use Homemade Bone Broth
Bone broth isn’t just for soup! Here are some ideas to make the most of your homemade broth:
- Sip as a Morning Drink: Start your day with a warm mug of bone broth for an energizing and hydrating alternative to coffee.
- Boost Grain Dishes: Cook rice, quinoa, or pasta in bone broth instead of water to add flavor and nutrients.
- Enhance Mashed Potatoes: Replace some of the milk or cream with bone broth for a rich, savory twist.
- Make Sauces and Gravies: Use bone broth as a base for pan sauces, gravies, or reductions.
How to make homemade bone broth:
- Fill a pot with bones.
- Cover with water.
- Add a splash of apple cider vinegar to help leech the minerals out.
- Slowcook for 12 to 48 hours, pressure cook for 2-3 hours.
- When your broth is finished, use it right away, or strain it into small jars.
- Make sure there’s a thick layer of fat on top of each one.
- Let it cool a bit, then put a clean lid on it and store it in your fridge.
- That layer of fat on the top will help it keep fresh for weeks, if it lasts that long.
- Use it to replace water in any recipe: rice, pasta, casseroles or soup.
Why Homemade Is Best
Store-bought bone broth can’t compare to the flavor and nutrient density of a homemade version. Many commercial brands add preservatives, salt, or artificial flavors, and they don’t achieve the same gelatinous texture. Making it at home ensures you know exactly what’s in your broth and allows it to be fully customizable.
Bone broth isn’t just a culinary trend—it’s a timeless tradition that can elevate your cooking and your health. By making it at home, you’re embracing a sustainable, nourishing, and delicious way to care for yourself and your family. Give it a try, and see how a simple pot of simmering bones can transform your kitchen and your well-being.
Once you’ve learned how easy it is to make your own bone broth, check out my post on some more simple kitchen habits for beginning homemakers to try!
More Easy Family Meal Ideas
- Easy White Chicken Chili (to use your bone broth!)
- Easy Philly Cheesesteak Casserole
- Our Favorite Tomato Soup
- Tavern Sandwich Meat
Homemade Bone Broth Recipe
If you try this recipe and love it, I would love if you could come back and give it 5 stars!
Homemade Bone Broth
Equipment
- 1 large pot, crock pot or Instant Pot
- 1 strainer
- 6 jars
Ingredients
- bones: chicken, beef, pork, fish, or a mix
- 2 tablespoons apple cider vinegar
- vegetables: scraps of carrots, celery, onions, garlic, etc (opt)
- herbs and spices: bay leaves, thyme, rosemary, and whole peppercorns (opt)
- Water: enough to completely cover the bones
Instructions
Prepare Your Bones
- If you’re using raw bones, you can roast them first at 400°F for 20–30 minutes to enhance the flavor of your broth by caramelizing the bones. Also, use any bones you have saved from other meals.
Combine Ingredients
- Add the bones, vegetables, herbs, and vinegar to a large pot or slow cooker. Pour enough water to completely cover the bones.
Slow Cook or Pressure Cook
- Bring the mixture to a gentle boil, then reduce the heat to a low simmer. Cook for 12–24 hours, adding water if necessary to keep the bones submerged.
- If using a pressure cooker, leave about 2 inches of space from the top to prevent over-pressurizing.
- Cook on high pressure for 2–3 hours. This is enough time to break down the bones and extract collagen and minerals.
- To release the pressure, allow the pressure to release naturally for 15–20 minutes, then do a quick release to finish.
Strain the Broth
- Once the cooking is complete, strain the broth through a fine-mesh sieve into canning jars to remove solids.
Cool and Store
- Allow the broth cool to room temperature before transferring it to the fridge or freezer.
Nutrition
Shop This Post
Pin It For Later


Have you tried incorporating making bone broth into your routine? How’s it going? Do you have any questions? Ask away, and I’ll answer them as soon as I can!